Have you spent a significant amount on a professional pool dehumidifier, but the results didn’t meet expectations? Condensation on the windows remains, mold keeps appearing in the corners, and the humidity level at best has only partially decreased? The issue may not be the quality of the equipment, but how it was installed. Statistics show that over 70% of dehumidifier performance problems are related to incorrect installation and placement.
A typical situation: a pool owner buys an expensive professional dehumidifier but installs it where it’s convenient or “where there was space” — in a corner, close to the water, or in an existing niche in the wall. The result is inefficient use of costly equipment and ongoing humidity problems.
In this article, we’ll break down the 5 most common critical mistakes when installing pool dehumidifiers and provide clear recommendations for the proper placement of MBA-G series equipment so you get maximum efficiency from your investment.
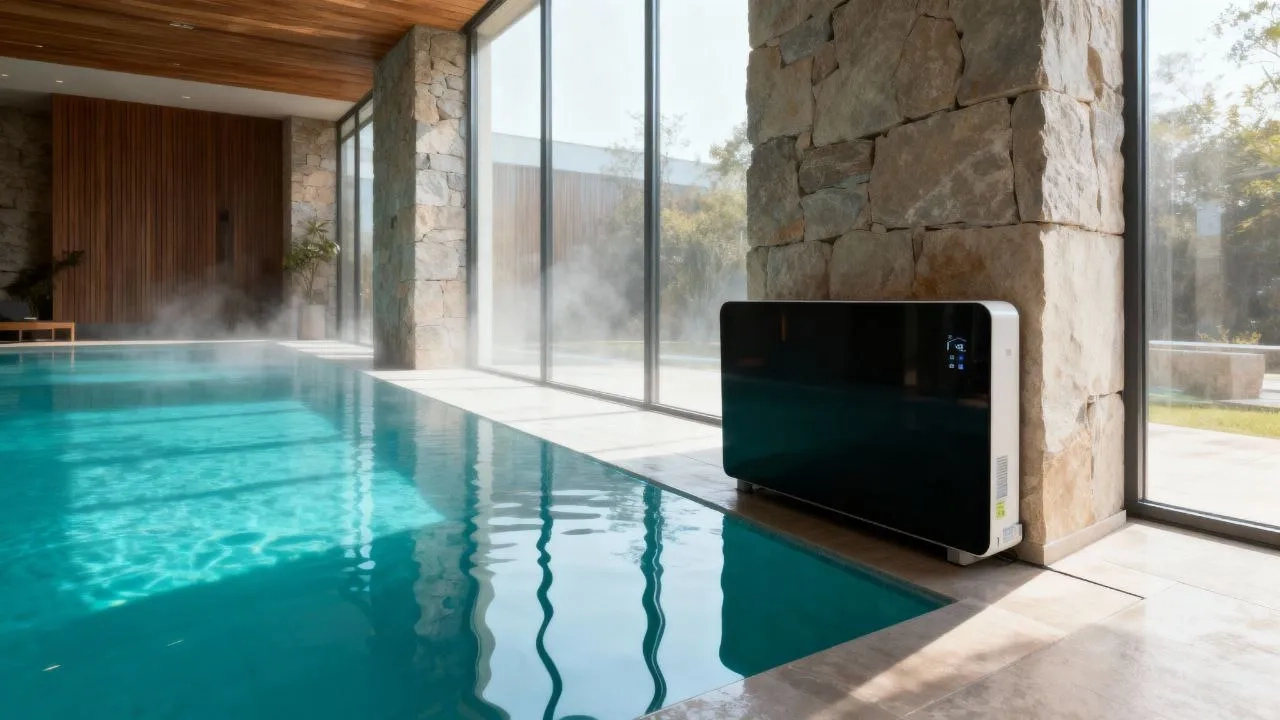
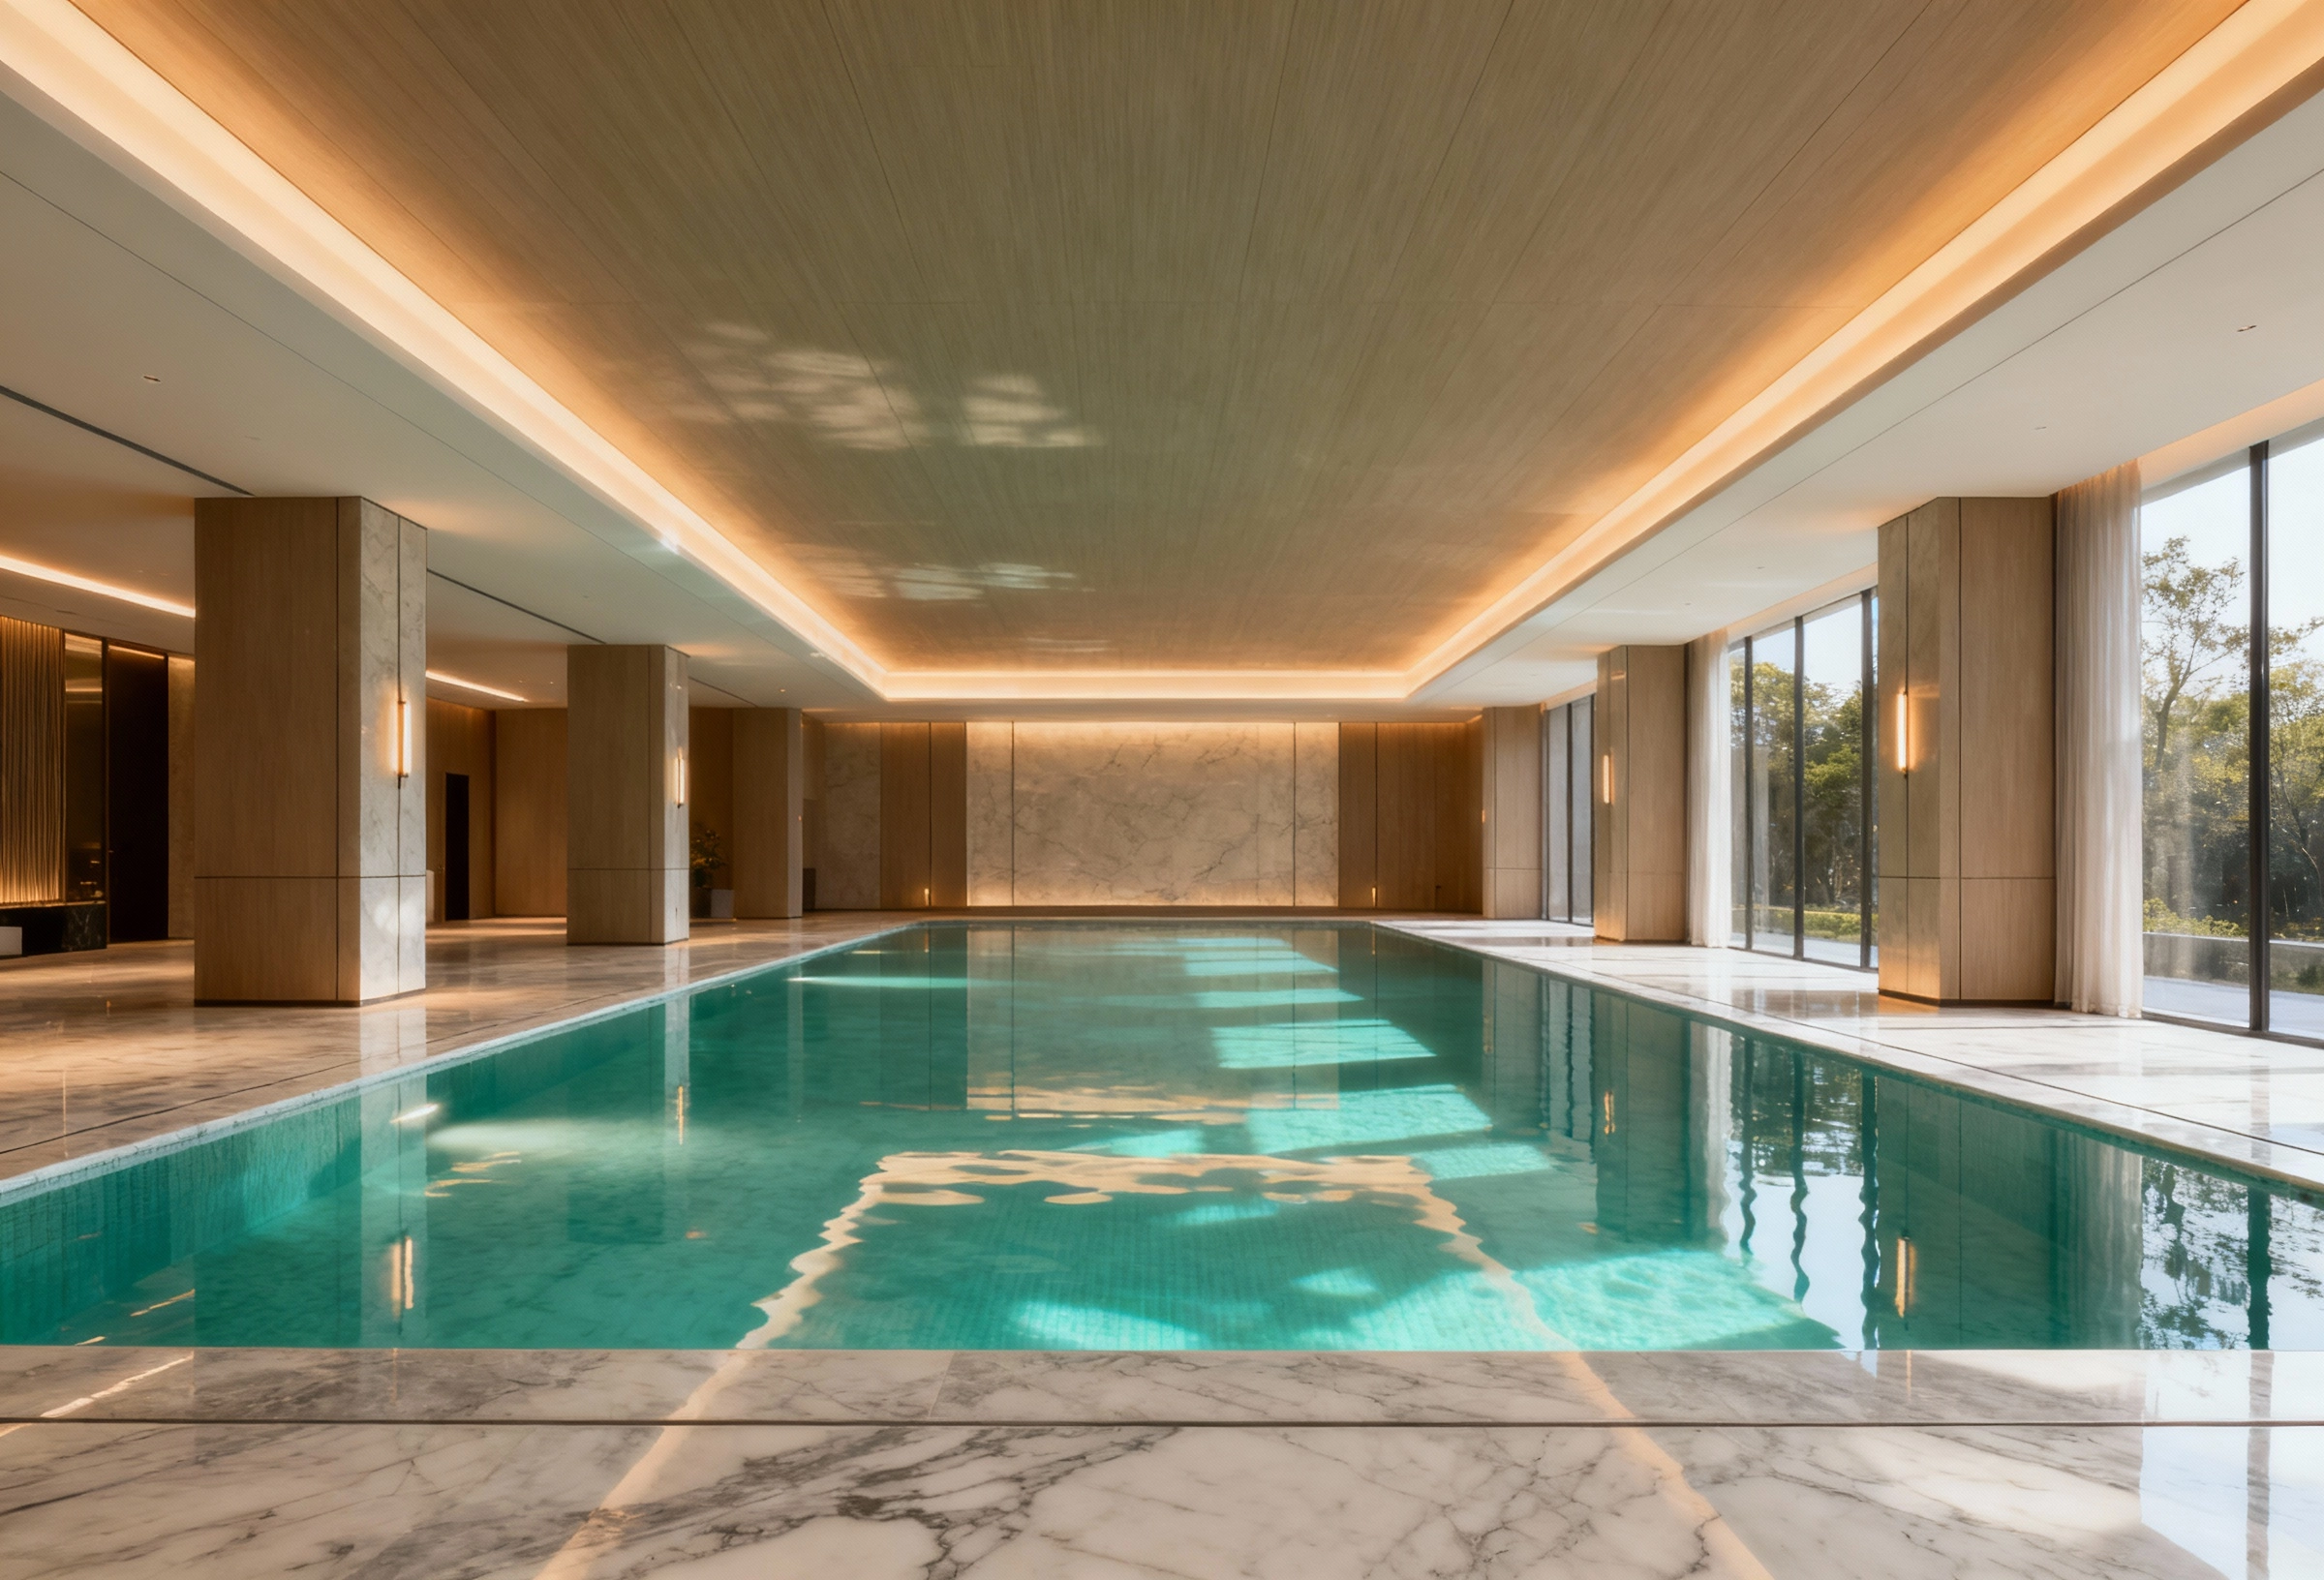
Mistake one – installing too close to the water
One of the most common mistakes is placing the dehumidifier in close proximity to the pool (0.5–1 meter from the edge). The logic seems obvious: “closer to the source of moisture = better dehumidification.” However, this logic is completely wrong and can lead to serious problems.
Why is this a critical mistake? When placed close to the water, the following issues arise:
- Water splashes regularly hit the housing and electronic components of the dehumidifier
- Water enters the air intakes, causing increased corrosion of internal parts
- Increased risk of short circuits due to moisture on electrical contacts
- Accelerated corrosion of fasteners, especially with chlorinated water
The consequences of such placement can be severe:
- Electronics failure within 6–12 months of operation
- Progressive corrosion of the housing and internal components
- Increased risk of electric shock for pool users
- Automatic voiding of the warranty, as improper installation violates operating conditions
How to correctly position the dehumidifier relative to the water:
- Minimum distance from the pool edge — 2 meters
- From splash zones — at least 3 meters
- If the pool has slides, fountains, or a jacuzzi — 4 meters or more
- For MBA-G wall-mounted models, placement outside the direct splash zone is mandatory
Mistake two – placing in a corner without air circulation
Dehumidifiers are often installed in a far corner so they “don’t get in the way” or because there happens to be a convenient outlet there. This placement significantly reduces the efficiency of the equipment and creates a number of problems.
Why is this wrong? A dehumidifier installed in a corner can effectively remove moisture only from a limited space around itself. As a result:
- The dehumidifier only draws humid air from the area right next to it
- Humidity remains high in the opposite part of the room
- “Dead zones” form where condensation accumulates
- Uneven dehumidification occurs: near the unit it may be 50% humidity, while the far end is 75%
- Air does not circulate evenly throughout the space
What this leads to:
- Condensation on windows and cold surfaces far from the dehumidifier
- Mold growth in corners and hard-to-reach places
- The dehumidifier runs at maximum power but fails to control humidity
- Increased energy consumption with low efficiency
- The impression that the dehumidifier “doesn’t work,” when the issue is its placement
Proper placement for effective air circulation:
- Install the dehumidifier in the central part of the long wall
- In a square room — opposite the entrance
- Ensure free space for air circulation on all sides
- The airflow should cover the entire room without obstacles
- Optionally install a ceiling fan to improve circulation (not mandatory, but boosts efficiency)
How to check circulation efficiency: perform a simple smoke test. Smoke should spread evenly from the dehumidifier to the far corners of the room and gradually return to the unit. If smoke stagnates in certain areas, circulation is insufficient.
Mistake three – incorrect or missing drainage
Many owners neglect proper connection of the drainage system, hoping to rely on the built-in condensate tank or routing the drain hose incorrectly. This creates a number of issues that significantly impact dehumidifier performance.
Let’s look at three typical drainage problem scenarios:
Scenario 1: Using only the built-in tank without connecting a drain
- The built-in tank fills in 4–8 hours of intensive operation
- The dehumidifier automatically stops when the tank is full
- While the tank remains full, humidity rises
- Typical situation: at night the tank fills, the unit stops, and in the morning there’s condensation on the windows
- Requires constant monitoring and frequent emptying, which is inconvenient
Scenario 2: Drain hose with kinks, bends, or upward runs
- Condensate cannot drain properly and stagnates in the hose
- After 1–2 weeks, a foul stagnant-water odor appears
- Bacteria begin to actively multiply inside the hose
- Possible backflow of stagnant water into the dehumidifier
- The odor spreads throughout the pool room
Scenario 3: Drain connected to the sewer without a trap
- Odors from the sewer system penetrate back through the drain hose
- An unpleasant smell spreads throughout the pool area
- Harmful microorganisms from the sewage can enter the room
Proper drainage connection for MBA-G models:
- Be sure to connect a 7 mm diameter drain hose
- The discharge into the sewer must be gravity-fed
- The hose should run with a continuous downward slope
- Kinks, bends, or upward runs are strictly prohibited
- Install a water trap (U-shaped bend) or a special non-return valve
- If gravity drainage is impossible, use a dedicated condensate pump
- Regularly check hose clearance (recommended once a month)
Mistake four – blocking the air intakes
During installation, free air access to the unit often doesn’t get enough attention. Blocking the air intakes sharply reduces efficiency and can lead to serious breakdowns.
Typical air intake blockage situations:
- Installing the dehumidifier flush against a wall without the required clearance
- Placing furniture or cabinets in front of the unit, blocking airflow
- Hanging towels or clothes on the dehumidifier housing
- Positioning plants or decorative elements near the air intakes
- Covering the dehumidifier with decorative panels without proper ventilation
Why this is a critical issue:
- The dehumidifier cannot efficiently draw humid air from the room
- Compressor overheating occurs due to insufficient cooling
- Dehumidification performance drops sharply (by 40–60% of the rated)
- Energy consumption increases by 20–30% while efficiency drops
- Overheat protection trips, causing shutdowns
- Accelerated wear of components, especially the compressor and fans
Consequences of blocking air intakes:
- The compressor overheats and may fail (costly repair)
- The dehumidifier does not fulfill its task even though it is technically sound
- Power consumption is significantly higher than the manufacturer’s stated level
- Increased noise level due to the constantly overloaded compressor
Placement rules for MBA-G wall-mounted models:
- Minimum height from the floor — 30 cm
- At least 50 cm of free space from the top of the unit to the ceiling
- Leave free space on the sides for servicing
- In front (air outlet direction) — at least 1.5 meters of free space
- No objects within a 50 cm radius of the air intakes
- Do not hang towels, clothes, or other items on the dehumidifier housing
- Do not cover the unit with decorative structures without proper ventilation
How to check proper airflow: place your hand at the air outlet — you should feel a strong, even flow. If the flow is weak or uneven, something is blocking normal circulation.
Mistake five – no dedicated power line
Many owners plug a powerful dehumidifier into a regular outlet along with other appliances or use extension cords and splitters. This creates serious risks for the equipment and can lead to emergencies.
Most common power supply mistakes:
- Connecting the dehumidifier to a general outlet with other devices
- Using a multi-socket extension (pool + dehumidifier + lighting + audio system)
- Laying a thin cable not rated for the required power
- Lack of proper grounding and short-circuit protection
Why is this a critical problem? MBA-G dehumidifiers have high energy demands:
- Rated power from 0.89 to 1.95 kW depending on the model
- Maximum power can reach from 1.89 to 2.7 kW
- Compressor inrush current is 3–4 times the rated
- When connected with other devices, the line becomes overloaded
- Wiring heating creates a fire risk
- Voltage spikes can damage the dehumidifier electronics
- Incorrect connection leads to voiding the warranty
Consequences of improper connection:
- The circuit breaker trips frequently, especially at startup
- The dehumidifier turns off when other high-power devices are switched on
- Possible control board failure due to voltage spikes
- Increased risk of wiring catching fire
- Warranty is voided if incorrect connection is detected
Proper power connection for MBA-G:
Electrical network requirements:
- Voltage: 220–240 V AC, 50 Hz
- Dedicated line from the electrical panel
- Circuit breaker: 16 A for MBA05G and MBA07G; 20 A for MBA10G
- Conductor cross-section: minimum 2.5 mm², 4 mm² recommended
- Mandatory grounding
- RCD (residual current device) rated at 30 mA
Outlet placement:
- Height from floor: 1.5–1.8 meters
- Moisture-proof outlet (at least IP44)
- Located outside the splash zone (minimum 2 meters from water)
- Accessible for maintenance
What to absolutely avoid:
- Extension cords and splitters for connecting the dehumidifier
- Shared line with heating appliances
- Connecting via a neighboring room with a cable run through the wall
- Outlets without grounding
Proper placement rules: checklist
Based on the analysis of the five main mistakes, let’s define clear principles for placing dehumidifiers in pool areas to achieve maximum equipment efficiency.
General placement principles:
- Wall-mounted dehumidifier height: at least 30 cm from the floor and no closer than 50 cm to the ceiling to ensure free airflow.
- Orientation relative to sun exposure: avoid installing on walls with direct sunlight, which can overheat the housing. A north-facing wall is usually better than a south-facing one. If installation on a south-facing wall is unavoidable, provide additional shading.
- Architectural features of the room: in elongated rooms, install the dehumidifier in the middle of the long wall. In square rooms — on the wall opposite the entrance. For L-shaped rooms, two dehumidifiers or an additional ventilation system may be required for even air circulation.
- Interaction with the ventilation system: do not install the dehumidifier directly opposite the supply air to avoid cold air blowing straight into the unit. It’s also not recommended to place it under an exhaust grille, as the dehumidified air will immediately be removed. The optimal location is between the supply and exhaust.
- Service accessibility: make sure you can access the dehumidifier for regular filter cleaning. The drain hose should be accessible for inspection, and indicators and display must be easily visible for monitoring.
Pre-installation checklist:
- Distance from water: more than 2 meters
- Location: central part of a wall (not a corner)
- Height from floor: at least 30 cm
- Free space above to the ceiling: at least 50 cm
- Free space in front: at least 1.5 meters
- Drainage: connected with downward slope, water trap installed
- Power: dedicated line with a 16–20 A breaker, grounding
- Outlet: moisture-proof (IP44 or higher)
- No furniture or objects near air intakes
- Service access ensured
Following these simple rules will significantly increase the dehumidifier’s performance, extend its service life, and minimize the risk of problems. Remember, even the most powerful and expensive dehumidifier cannot work effectively if it is installed incorrectly.
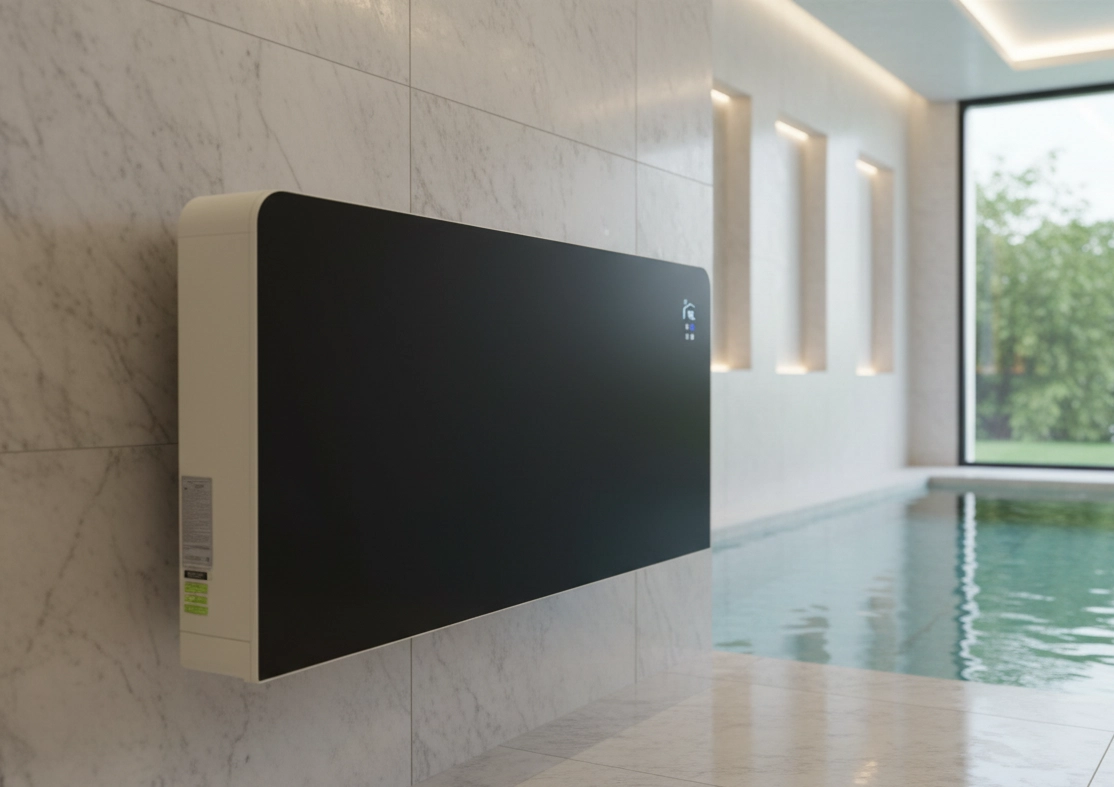
Installation features of the MBA-G wall-mounted series
MBA-G wall-mounted dehumidifiers from Mycond have specific installation features that must be considered to ensure maximum efficiency and longevity.
Wall mounting:
- Wall-mount brackets are included
- Mounting must be done with anchor bolts (do not use regular wall plugs)
- The wall must support the dehumidifier’s weight with a +10 kg safety margin
- Mount only on load-bearing walls (not on drywall without proper reinforcement)
Compact dimensions:
- MBA05G: 1343 x 248 x 790 mm (length x width x height)
- MBA07G: 1543 x 248 x 790 mm
- MBA10G: 1743 x 248 x 790 mm
- Ultrathin housing (248 mm) doesn’t protrude far into the room
Utility connections:
- 7 mm drain hose exits from the side or bottom of the unit
- Power cable can be routed from the bottom or side
- Hidden routing in wall chases is possible for a cleaner look
Corrosion protection:
- Gold epoxy coating on the heat exchanger provides corrosion protection even in humid environments
- Especially important in coastal regions where air contains salts
- The protective coating ensures durability even with less-than-ideal room ventilation
With proper installation, MBA-G wall-mounted dehumidifiers provide not only maximum efficiency but also a clean aesthetic thanks to modern design and the possibility of hidden utility routing.
Problems due to improper installation and their solutions
| Problem symptom | Possible cause (installation error) | Solution |
|---|---|---|
| Condensation in one part of the room | Dehumidifier installed in a corner, no air circulation | Reinstall the dehumidifier at the center of a wall for even circulation |
| Circuit breaker trips constantly | No dedicated power line, overload | Run a dedicated line with a 16–20 A breaker depending on the model |
| Stagnant water odor | Drainage issues, hose kinks or bends | Check the drain hose, remove bends, ensure proper slope |
| Dehumidifier shuts off by itself | Overheating due to blocked airflow | Remove objects around it, ensure free space |
| Low dehumidification efficiency | Dehumidifier installed too close to the water, splashing | Move it 2 meters or more away from the pool edge |
| Increased noise level | Compressor overloaded, air intakes blocked | Check air intakes, ensure free space |
| Mold quickly reappears | “Dead zones” without air circulation | Add a fan to improve circulation or reinstall the dehumidifier |
| Dehumidifier housing rusts | Located in the splash zone, no protective coating | Move it away from water, choose a model with epoxy coating (MBA-G) |
As the table shows, most dehumidifier efficiency issues are directly related to installation and placement errors. Proper installation helps avoid all these problems and ensures maximum performance. Pay special attention to air circulation and distance from water sources. Relocating a poorly placed unit often yields better results than replacing it with a more powerful model.
Frequently asked questions about installing MBA-G dehumidifiers
Where is it better to install a dehumidifier: on the wall or on the floor?
Wall mounting has significant advantages for pool areas. It saves valuable floor space, eliminates the risk of flooding during leaks, and provides better air circulation. MBA-G models are specifically designed for wall mounting and include all necessary brackets.
At what distance from the pool should the dehumidifier be?
The minimum safe distance is 2 meters from the water’s edge and 3 meters from active splash zones. If the pool is equipped with slides, fountains, or a jacuzzi, increase the distance to 4 meters or more. Remember that splashes on electronics can cause short circuits and damage the equipment.
Can the dehumidifier be installed in a technical room next to the pool?
Technically, yes, but it requires a ducted system with air ducts into the pool area. MBA-G wall-mounted models are designed for installation directly in the pool room. If installation in a separate technical room is necessary, consider dedicated ducted dehumidifier models.
Is a special permit required for installation?
No special permit is required, but electrical work must meet all current safety standards: dedicated line, proper grounding, and a correctly rated protective breaker. It is strongly recommended to involve certified specialists for installation, especially for electrical connections.
How much does professional installation cost?
The cost depends on the region and the complexity of the work. Basic wall-mount installation typically takes 2–4 hours of a specialist’s time. Additional costs may arise if a dedicated power line and proper drainage need to be arranged.
Can I install the MBA-G dehumidifier myself?
Yes, if you have the necessary skills: installing brackets, connecting the drain, and basic electrical work. However, for running a dedicated power line, we strongly recommend hiring a qualified electrician. Safety in a humid environment is paramount.
What if it’s impossible to run a dedicated power line?
At a minimum, make sure the existing line is rated for a 16–20 A load (depending on the dehumidifier model). Install a dedicated breaker in the panel for this line. Do not connect other high-power devices to the same outlet. If possible, replace the wiring with a larger cross-section cable (at least 2.5 mm²).
Why is the dehumidifier louder than the specifications state?
Increased noise can be caused by several factors: blocked air intakes leading to compressor overload; vibration due to weak wall mounting; resonance with building elements. Check installation correctness, distances to walls and objects, and mounting integrity. Sometimes installing additional vibration-damping pads helps.
Conclusion
Proper installation accounts for 50% of a dehumidifier’s effectiveness. Even the most powerful and expensive unit cannot perform efficiently if it’s installed incorrectly. Avoid the five critical mistakes we discussed: placing too close to water, positioning in a corner without air circulation, improper drainage, blocking air intakes, and lacking a dedicated power line.
Mycond MBA-G dehumidifiers are professional equipment that requires a professional approach to installation and operation. Mycond is a leader in its segment for those seeking a comprehensive, modern, and energy-efficient microclimate solution without overpaying for a big-name brand.
Key advantages of Mycond MBA-G dehumidifiers include:
- Premium compressors for reliable operation
- Innovative technologies, including epoxy-coated heat exchangers
- Use of modern refrigerant R32
- Energy-efficient DC motors
- Ability to integrate with other Mycond systems (heat pumps, ventilation)
Want to get the most out of your dehumidifier? Contact us for a free consultation on selecting and installing an MBA-G dehumidifier. Our specialists will help calculate the required capacity for your pool and recommend optimal placement considering all room features.
Quick installation checklist:
- Distance from water > 2 m
- Placement on a central wall
- Connected drain with slope
- Dedicated power line
- Free airflow
Correct installation formula:
Proper placement + Quality installation + Regular maintenance = Maximum efficiency and longevity